

Installing the Slicky Application
Follow the instructions here to install the Slicky Application to your computer.
Changing Your Slicky’s Color
First, plug your Slicky into a usb port on your computer using the included micro-usb cable. You then have two options to change your Slicky’s color:
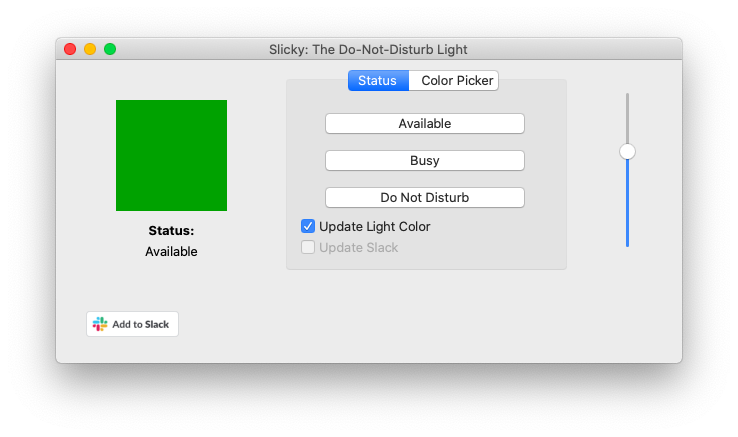
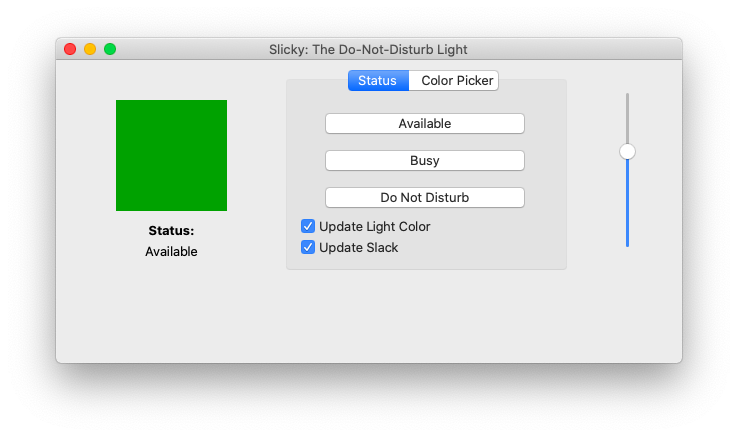
Select one of the pre-set statuses (Available: Green, Busy: Yellow, Do Not Disturb: Red). Make sure the ‘Update Light Color’ checkbox is checked.
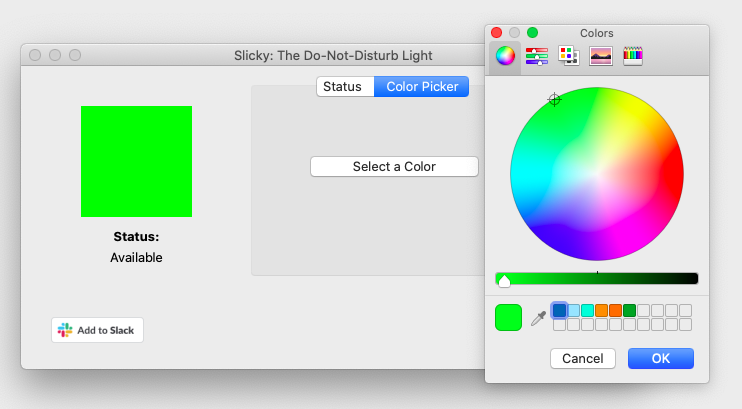
Open the Color Picker and select a color.

Changing the Brightness of Your Slicky
Use the slider on the right-hand side of your Slicky application to adjust the brightness of the Slicky.
Customizing Your Default Statuses
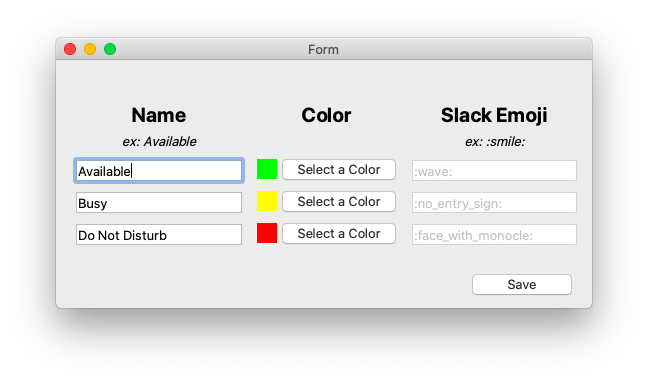
Go to Customize > Customize Statuses on the Menu Bar of your Slicky app to change your default statuses. You can update the name, color, and (if you have Slack enabled) the Slack status emoji.
Connecting Slicky to Slack
You can easily use the Slicky app to update your Slack status at the same time as you update your Slicky color! For more information on Slack, visit their website: www.slack.com.
Press the ‘Add to Slack’ button on the bottom left-hand side of your Slicky application to begin the process.

You should then be redirected to Slack’s website. Make sure you are logged in to the workspace you want your statuses to be sent to. Once logged in, you’ll see a page that looks something like this:

This tells you what Slicky is able to do. All Slicky does is update your status when you ask it to. Make sure to press ‘Allow’ if you want to enable Slack status updates. If not, press ‘Cancel’.
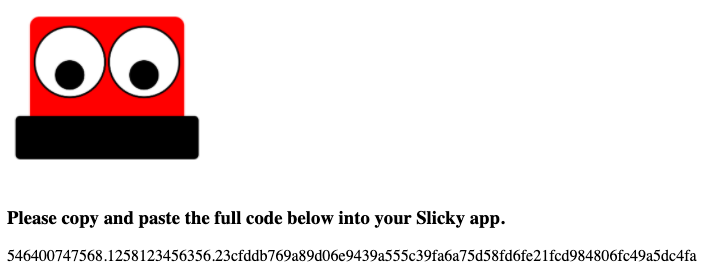
If you click ‘Allow’, you will be redirected to our website to get your authorization code. Copy the code from your webpage. It will look similar to the one below.
Paste that code into your Slicky application on the screen that looks like this:
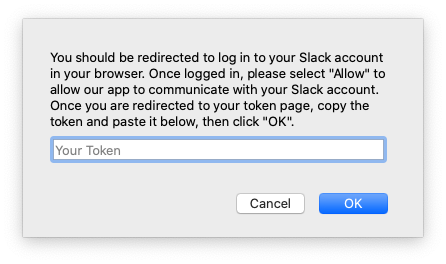
Once you’ve pasted your code/token, press the ‘OK’ button. If everything worked correctly, the ‘Update Slack’ checkbox should be enabled (as shown below). If you have the box checked, anytime you click on one of your statuses, your Slack status will also be updated. If you wish to disable this feature, simply uncheck that box.
If you need to reconfigure your Slack connection, go to Customize > Reconfigure Slack on your Menu Bar to repeat these steps.
